For Developers · Monetization Ads Provider
Secured Linkvertise
Secured Linkvertise is the anti-bypass version of Linkvertise. Setup is more involved than the normal variant — you create one Linkvertise link per checkpoint, paste the destination Panda Auth generates, then configure the Anti-Bypass token. The payoff is much harder-to-fake completions.
Per-checkpoint setup
Before you start
You need a Linkvertise publisher account. Sign up or log in at publisher.linkvertise.com before continuing.
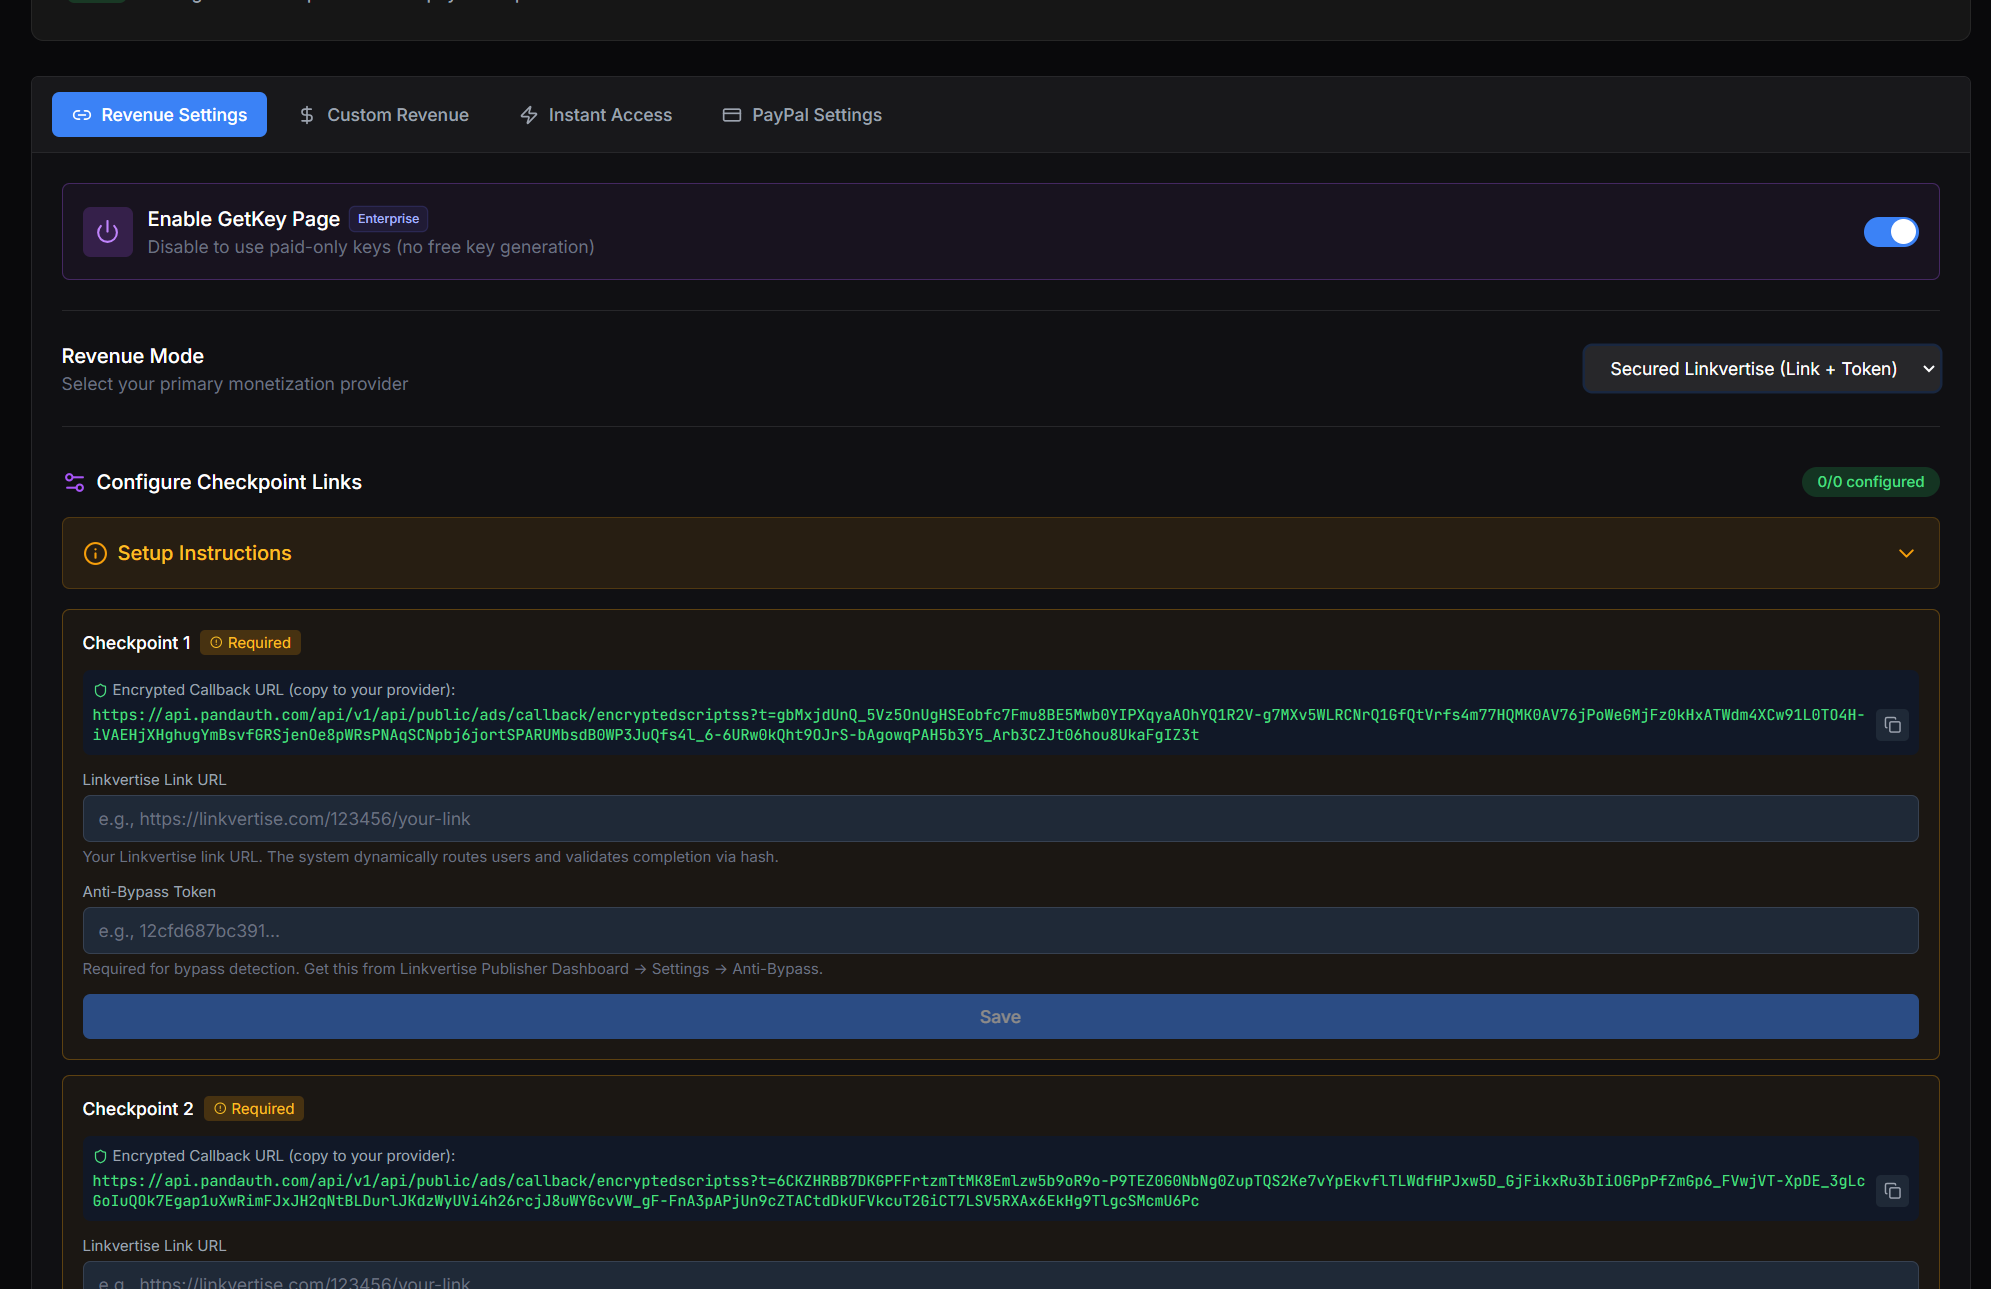
Step 1 — Open Linkvertise and start a new link
Log into your Linkvertise dashboard and click Post and earn (top menu) to start creating a new link. You will be redirected to the link-creation page.
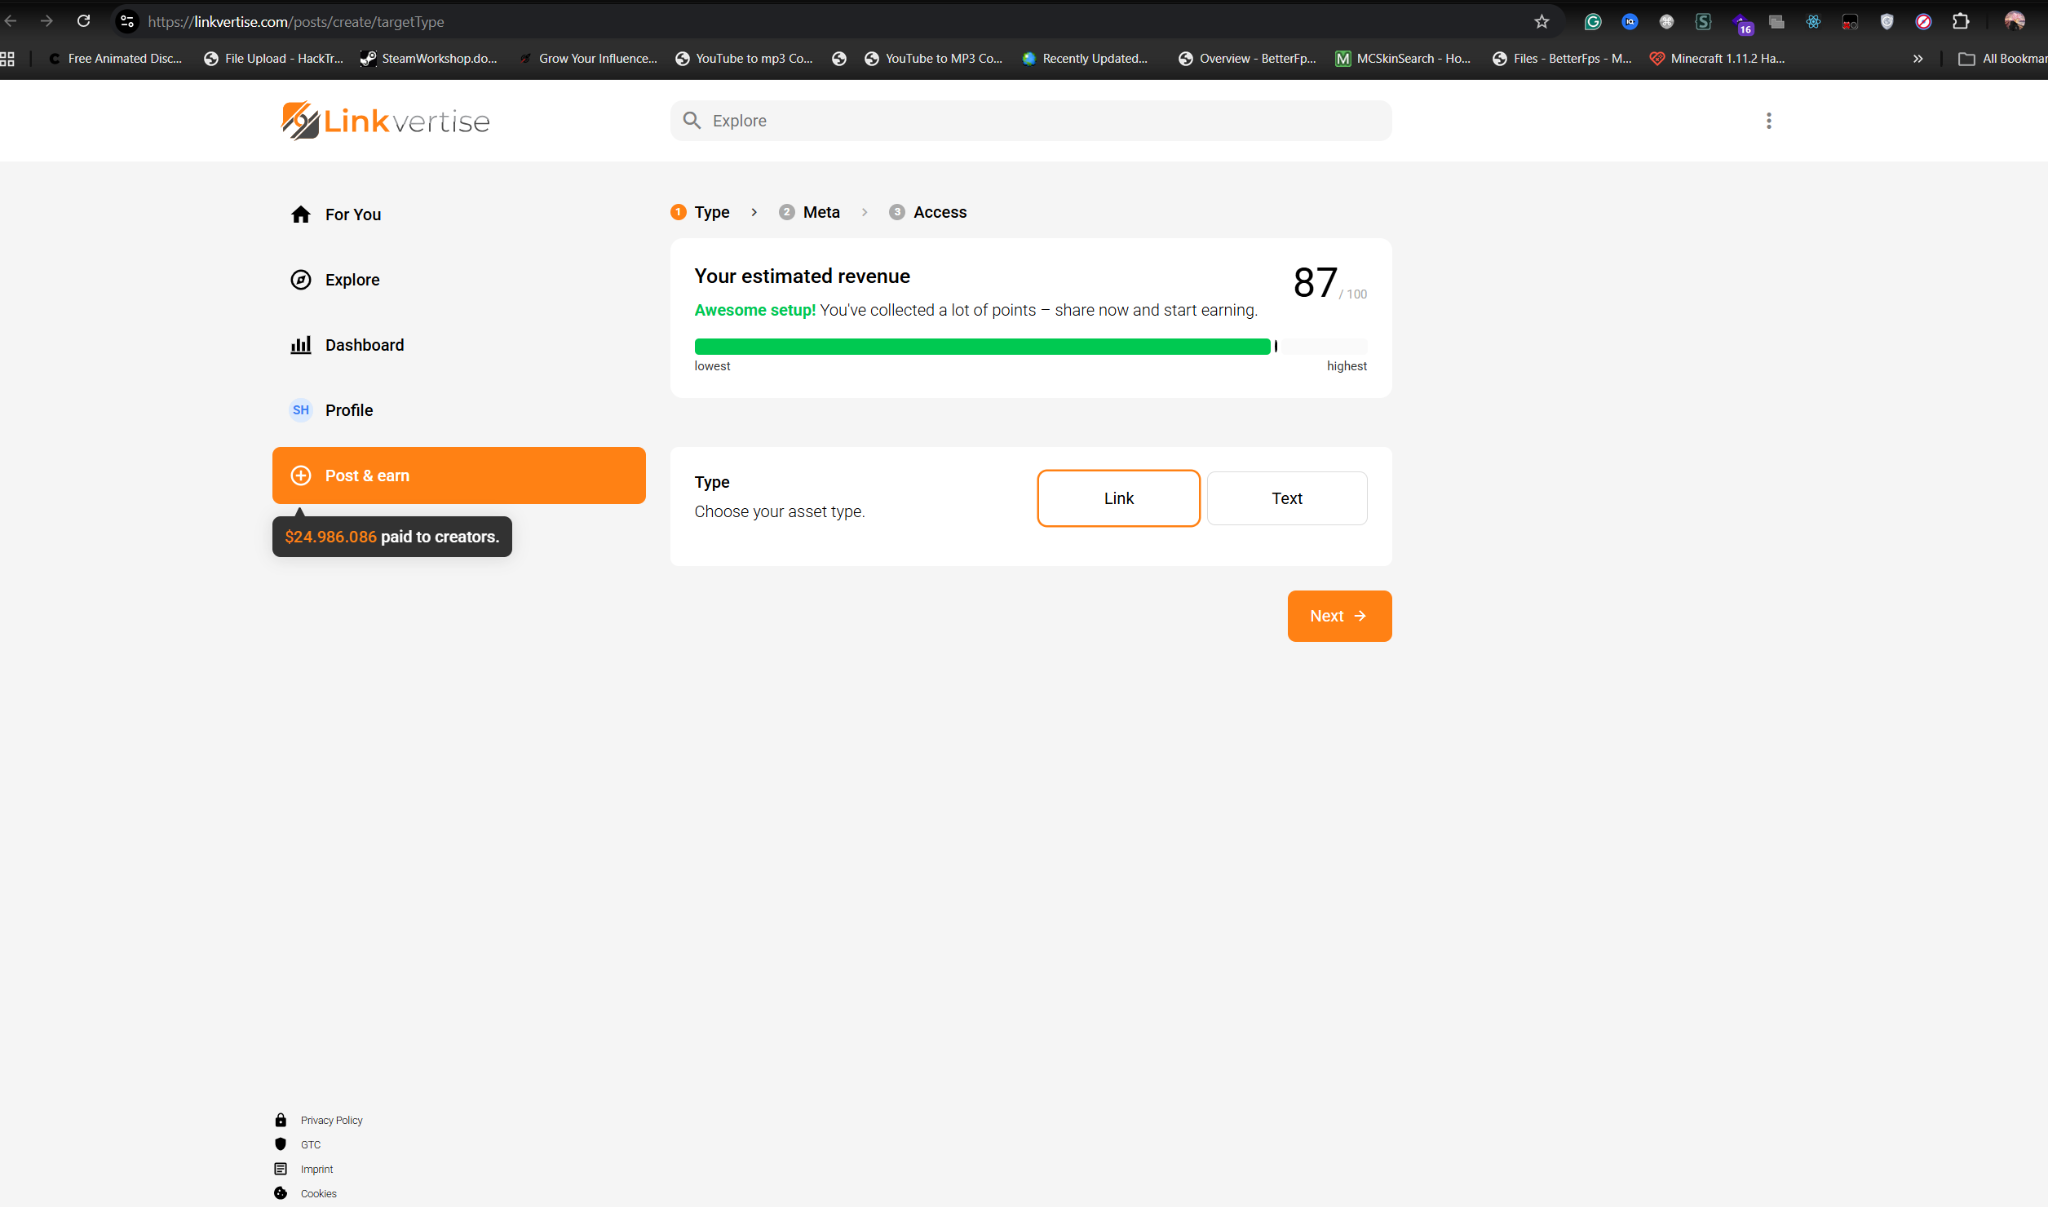
Step 2 — Create a new link
On the link-creation page, fill in the basics and create the link. The destination URL is what Panda Auth tells you next — leave it as a placeholder for now if needed, you will paste the real one in Step 4.
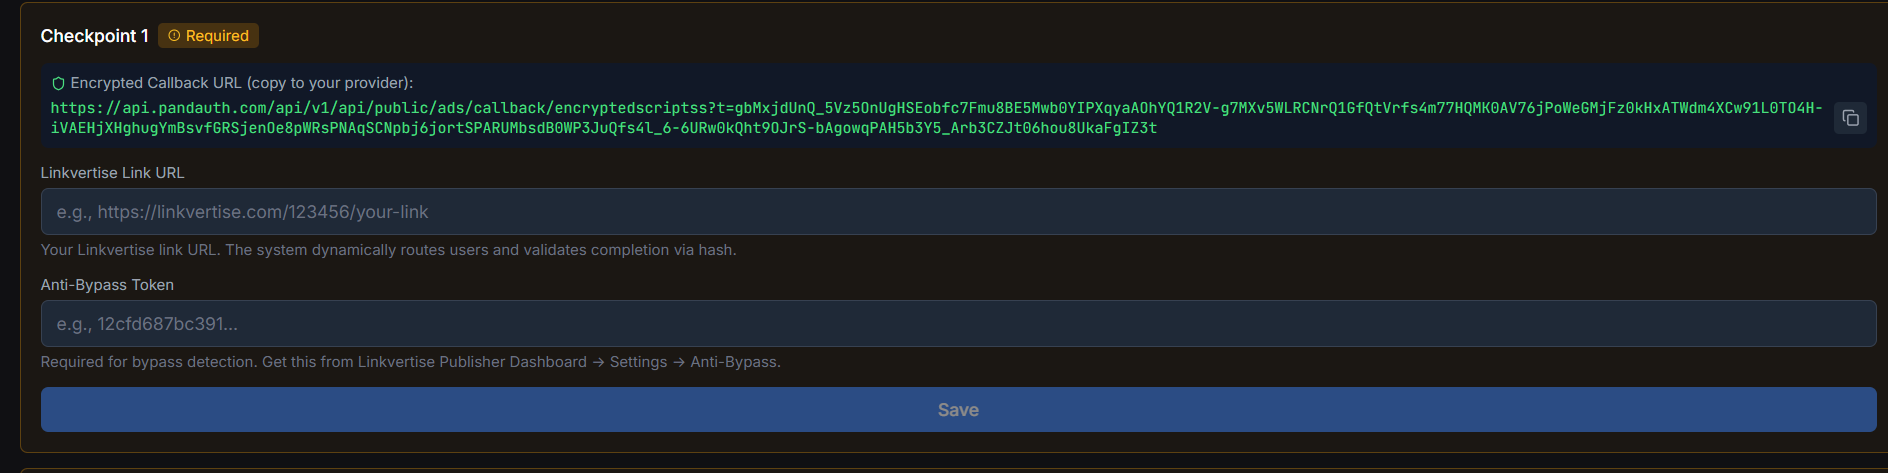
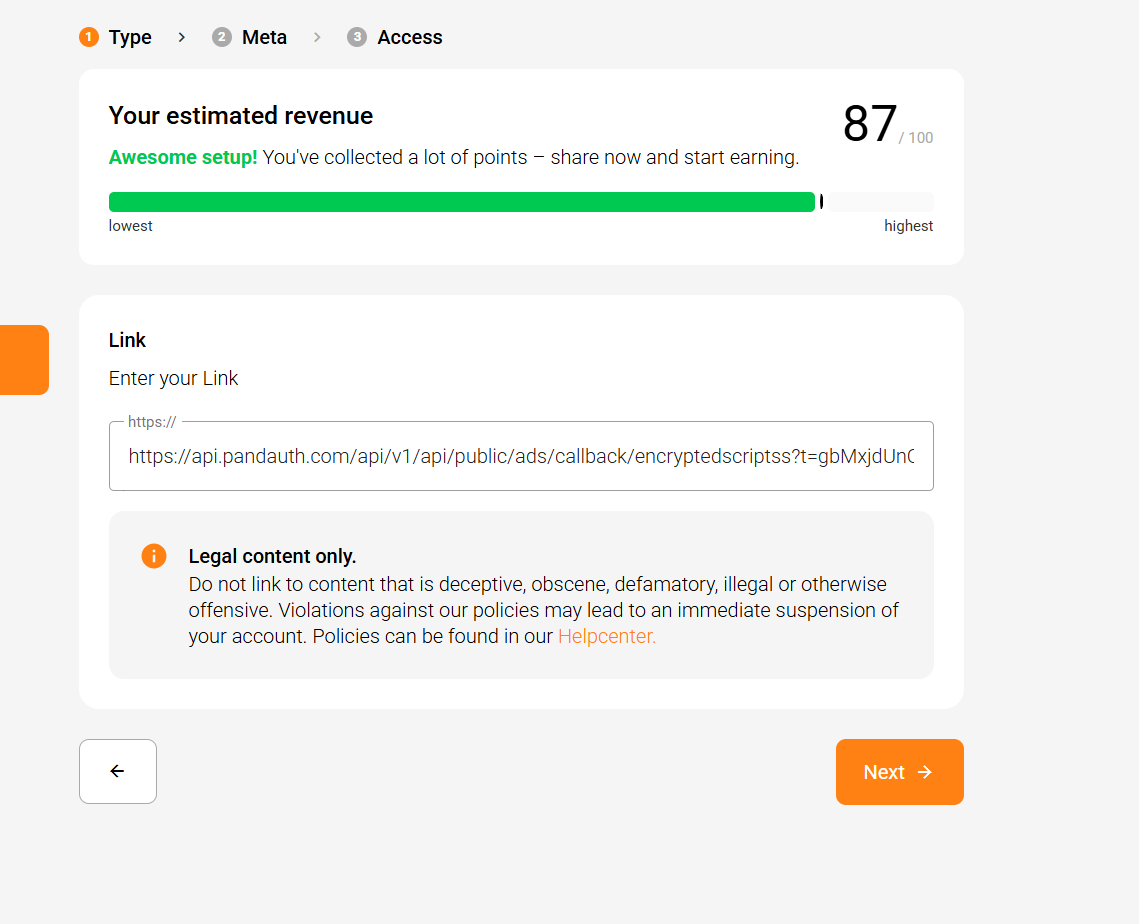
Step 3 — Copy the checkpoint destination from Panda Auth
Switch to your Panda Auth dashboard, open Monetization Settings → Custom Revenue, find the checkpoint you are configuring, and copy the destination link Panda Auth shows for it.
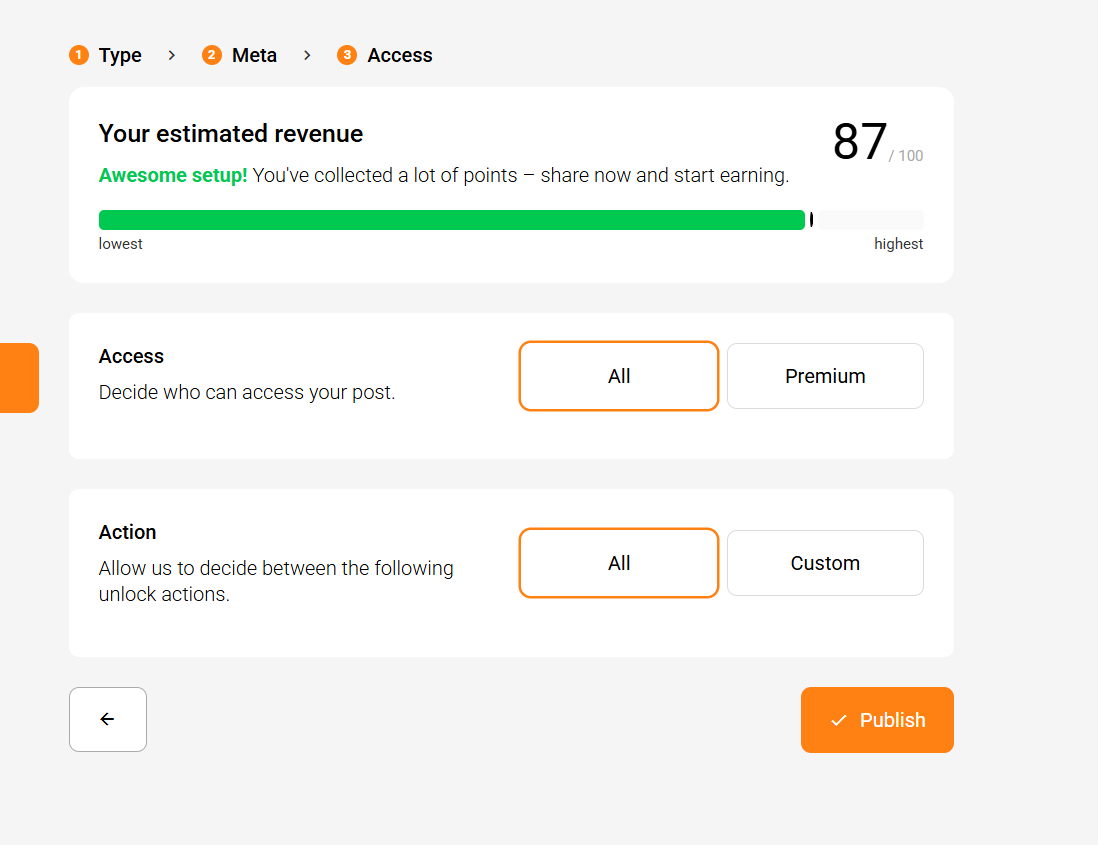
Step 4 — Paste the destination into Linkvertise and save
Back on the Linkvertise link page, paste the Panda Auth destination into the Target URL field, then save. Once saved, copy the resulting Linkvertise URL — that is what goes back into Panda Auth for this checkpoint.
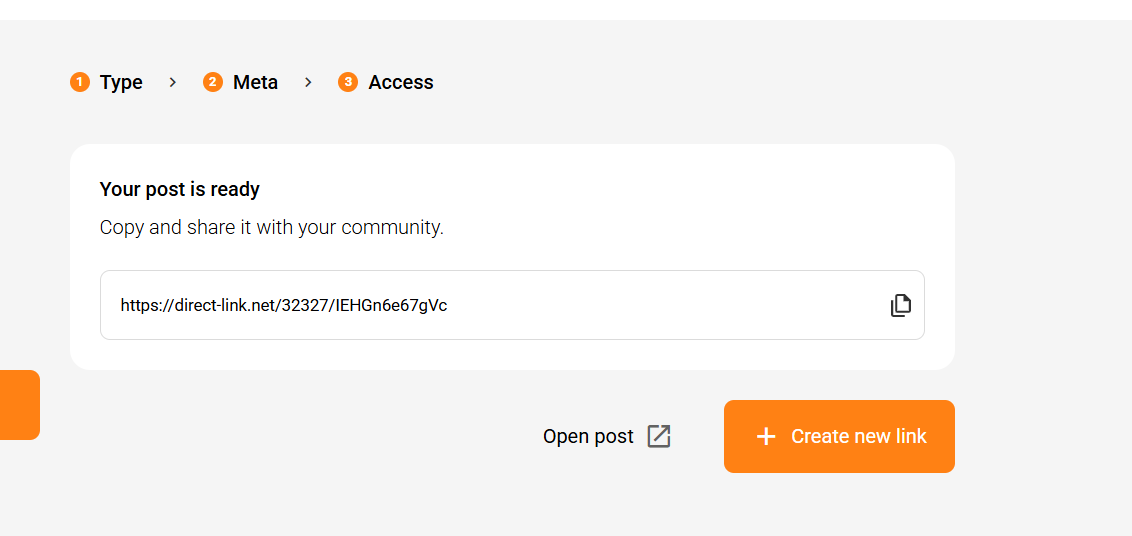
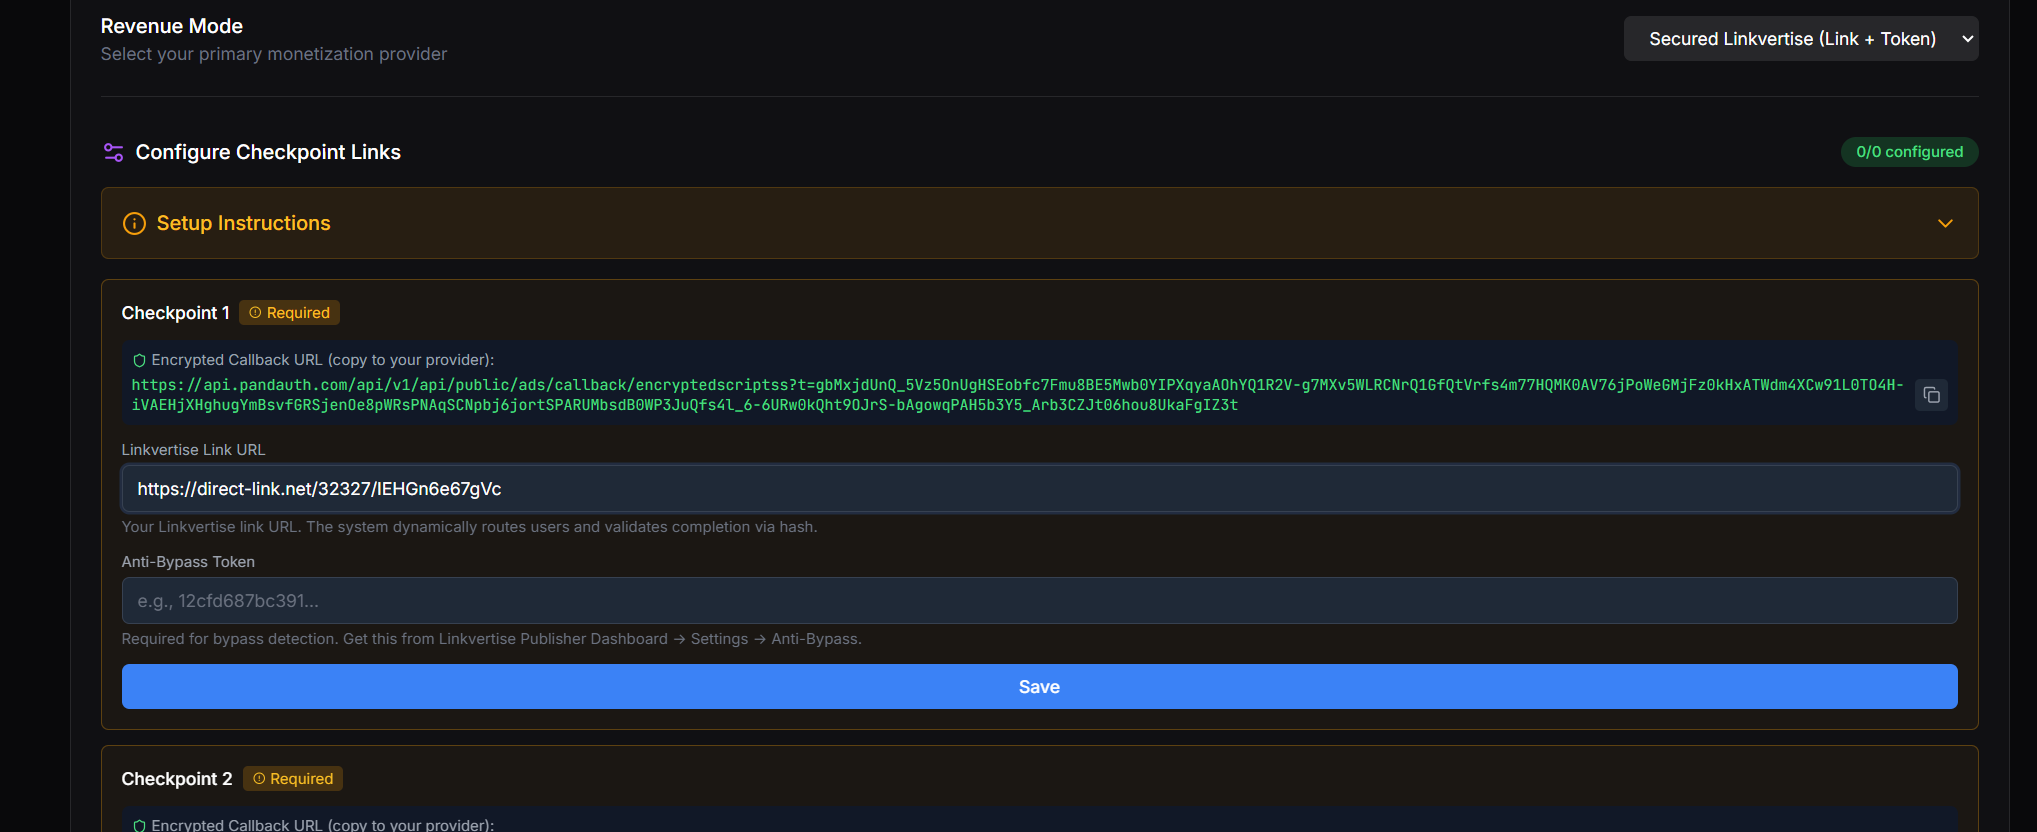
Step 5 — Configure the Anti-Bypass token
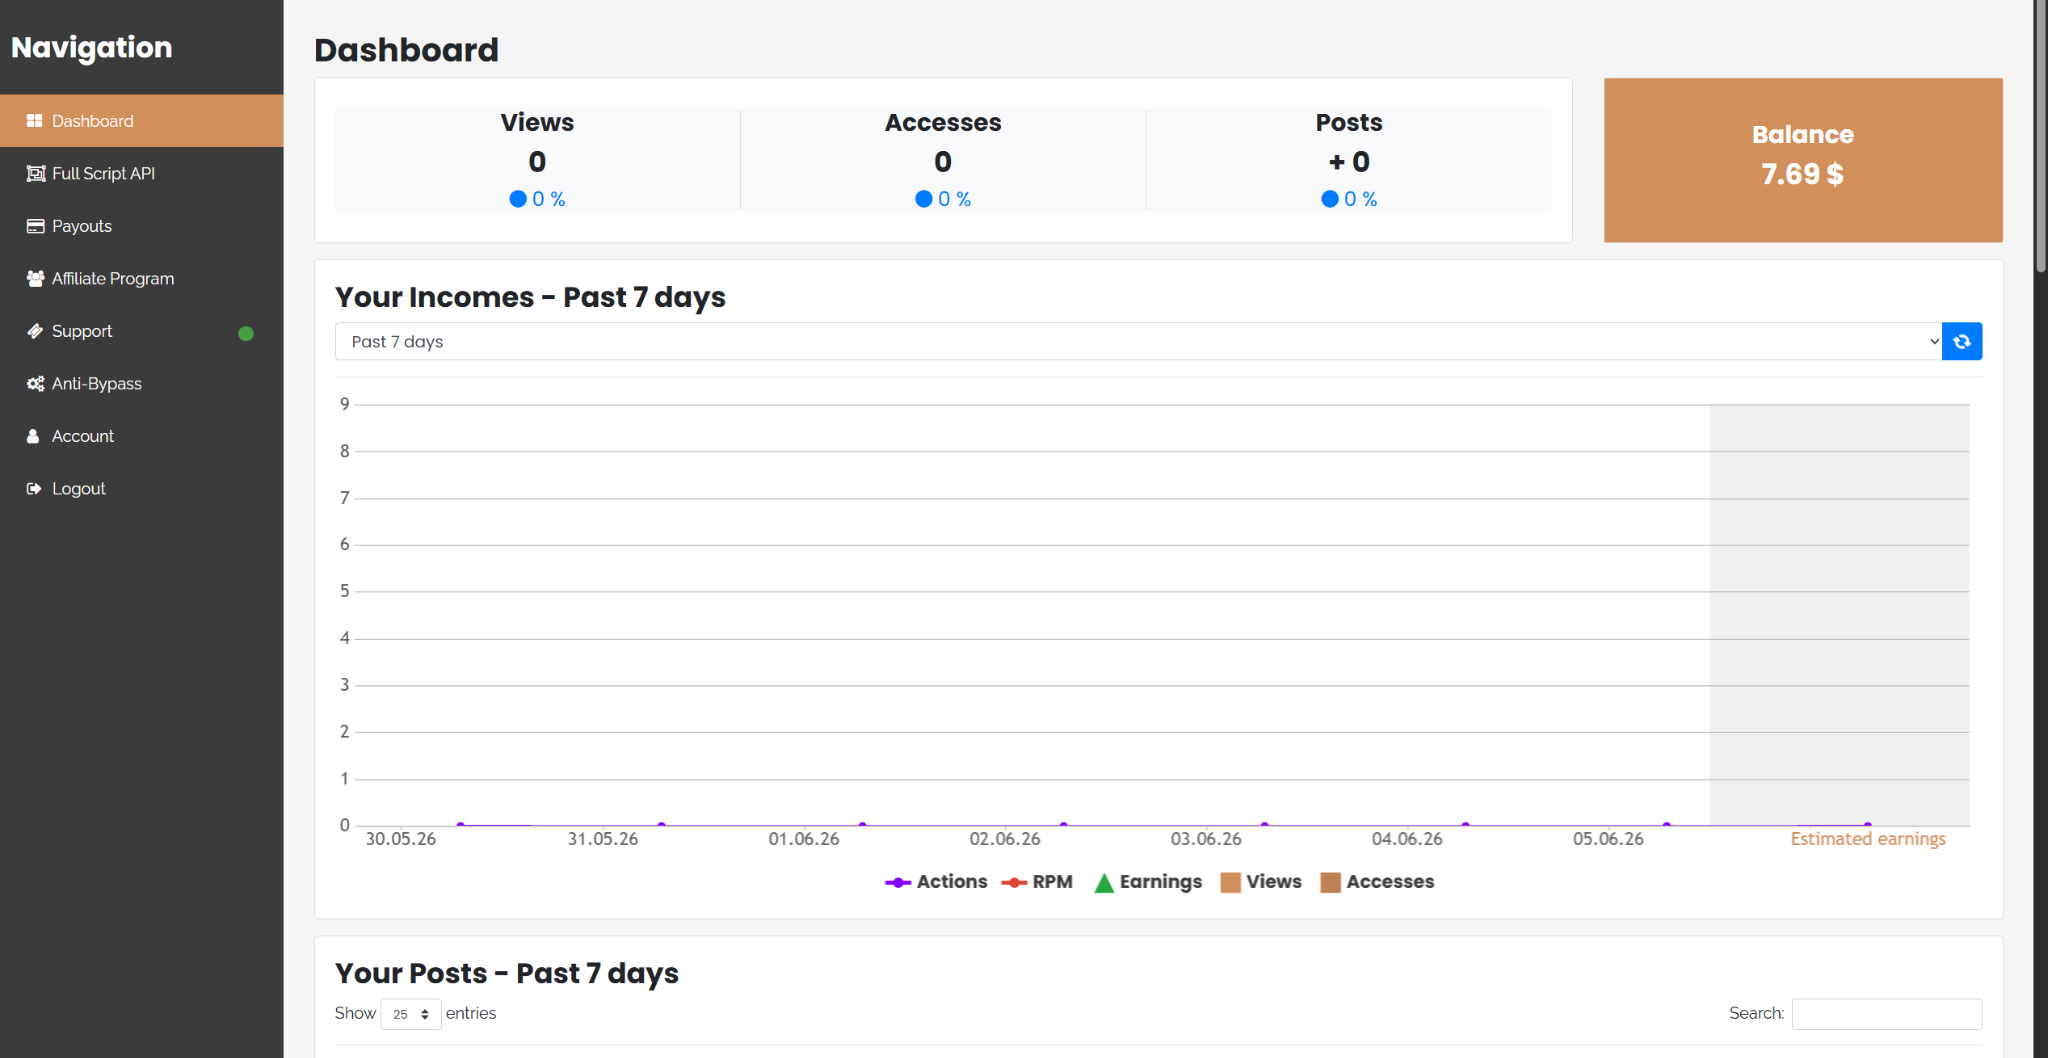
In the Linkvertise dashboard sidebar, navigate to Anti-Bypass. Check the Use anti bypassing checkbox, then copy the anti-bypassing token Linkvertise shows you.
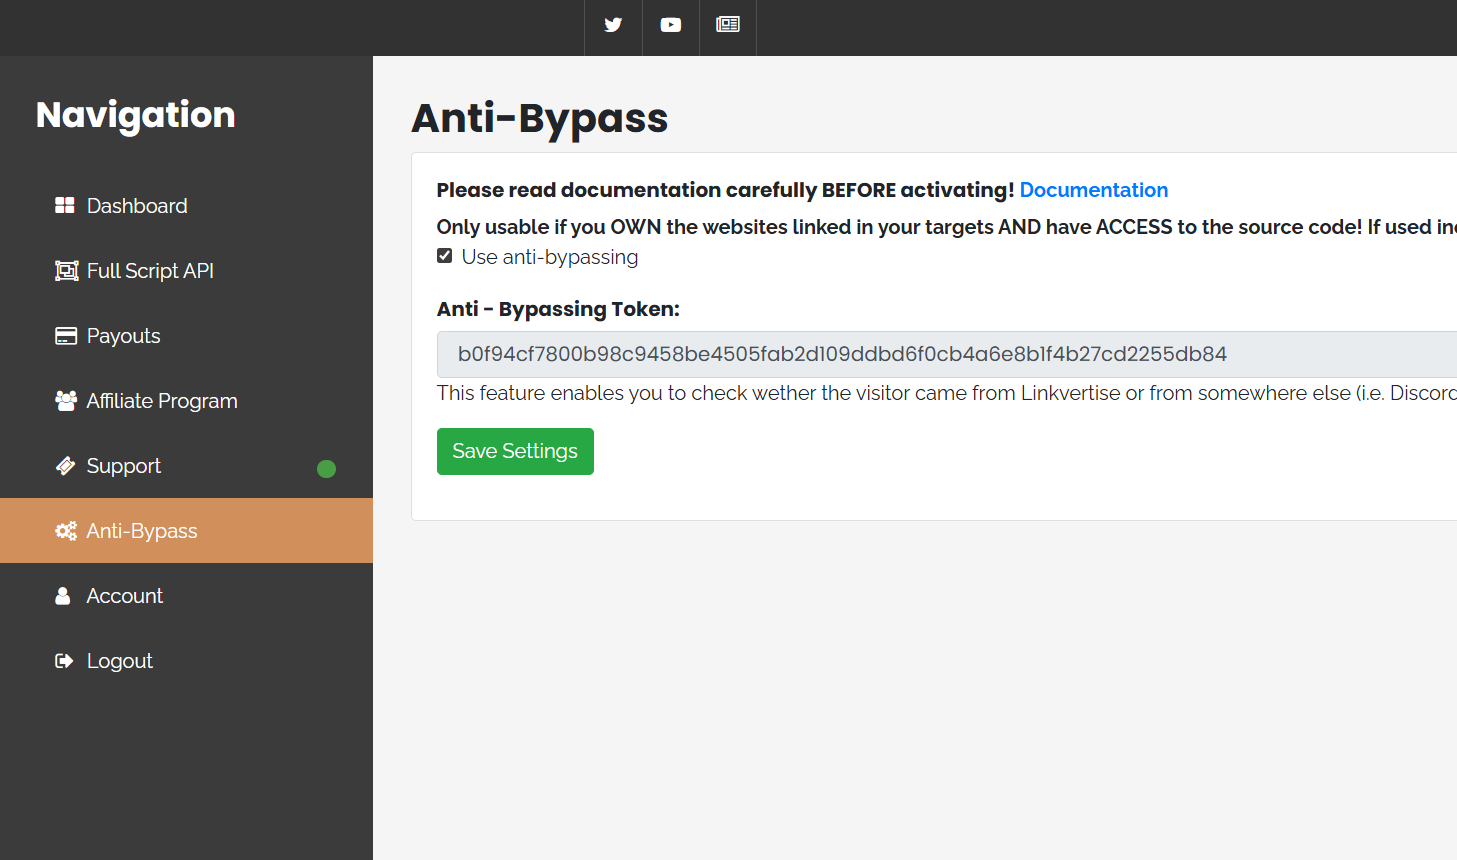
Back in Panda Auth, paste that token into the Anti-Bypass Token field for the checkpoint. Click Save Changes.
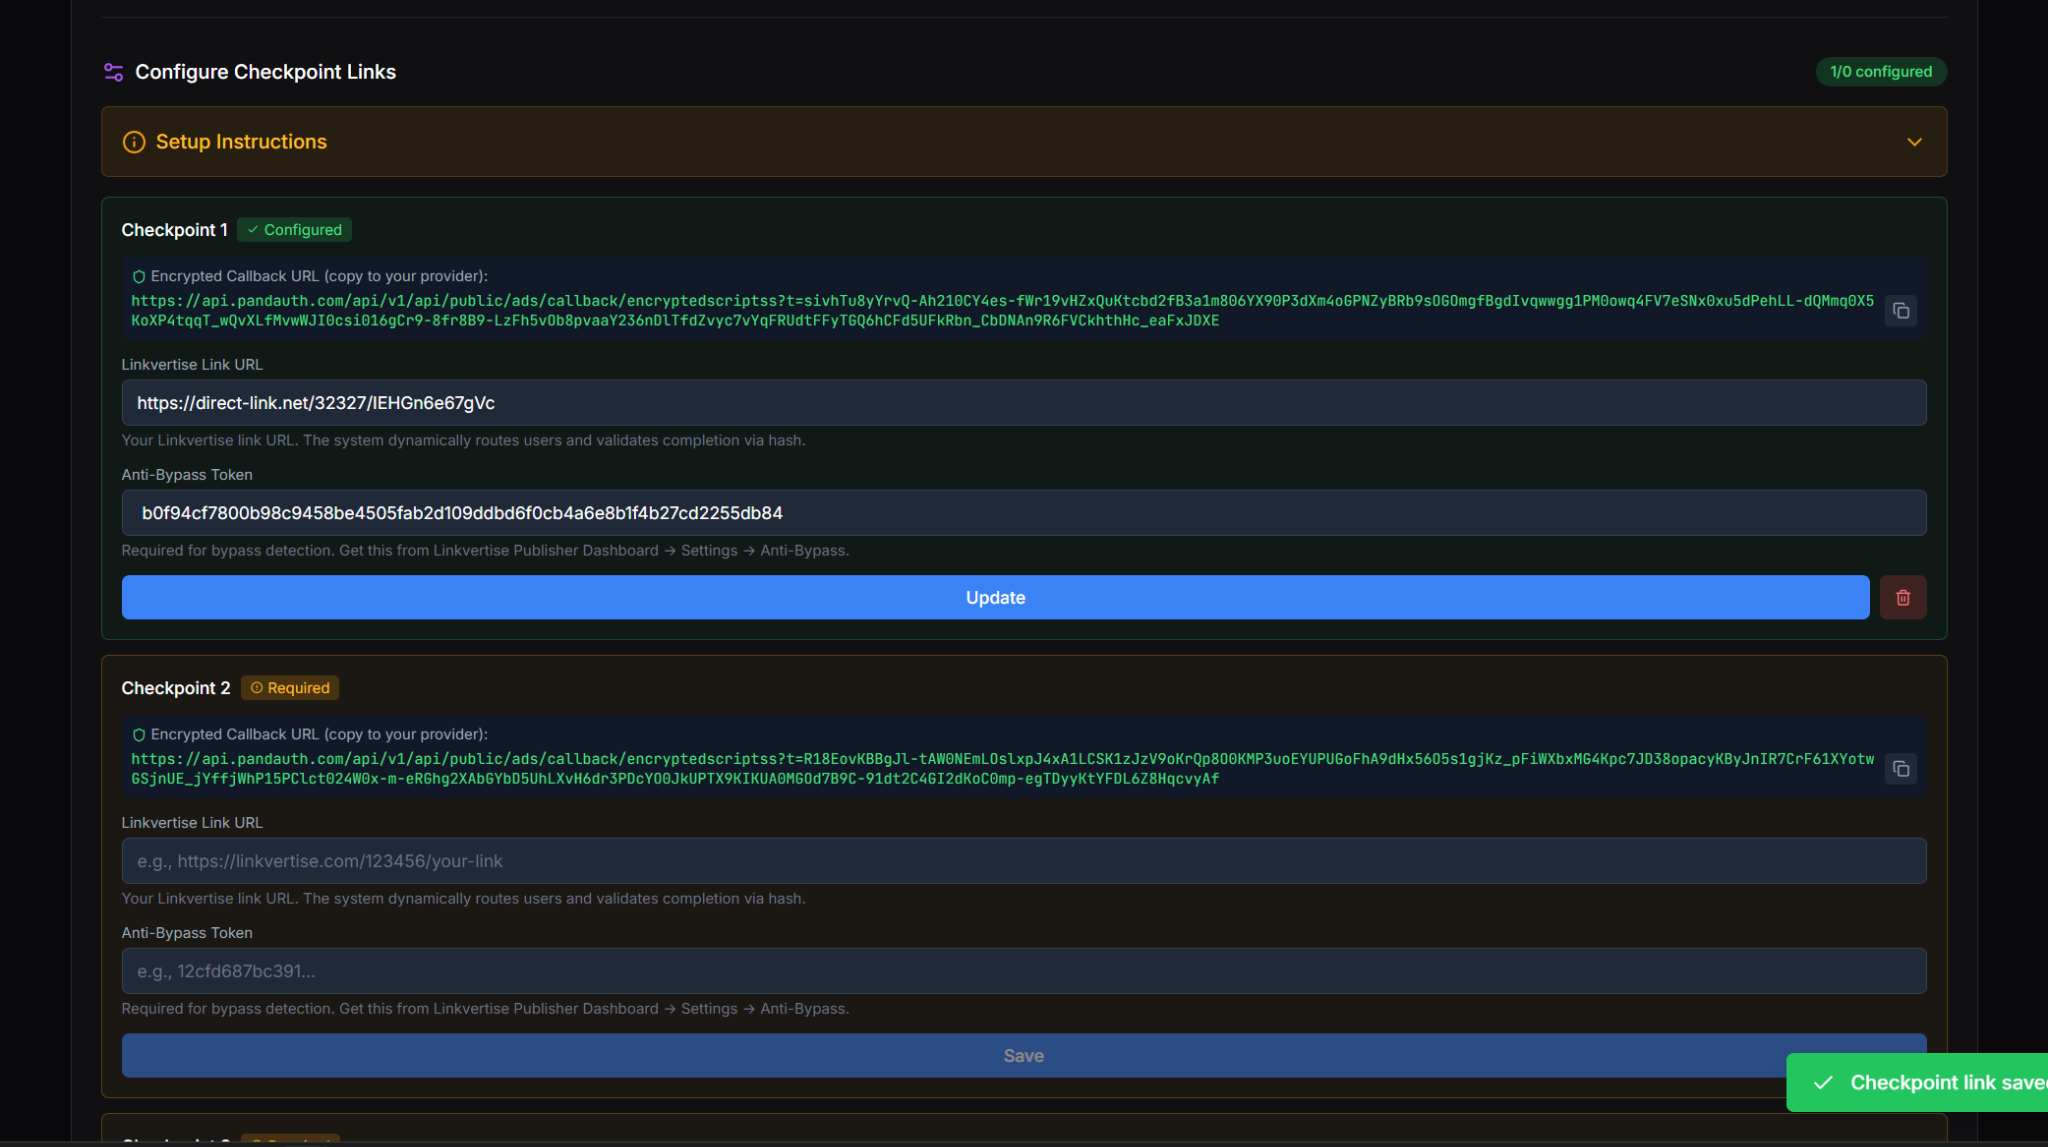
Repeat for every checkpoint
Done
Heads up